Technical wool fabric: Spinning the over coat
Summer is well on it’s way and I have started spinning for real! I usually prefer to spin wool yarn on a drop spindle wool but for this project I have chosen to use a spinning wheel instead. The wheel offers a much higher production speed than the drop spindle, even though (in my opinion) a little of the precision gets lost and it’s not as easy to get the same level of tension on all of the yarn. Perhaps this is just because I have spent many more hours spinning on a drop spindle than on a wheel though!
Before I start spinning I prepare my fibers. As the spinning wheel is quicker than the drop spindle it is helpful to have a big bunch of fibers to spin from, and so my little balls of overcoat fibers need to be turned into a large, homogenous mass of aligned fibers!

All the tools I use for the prep of the over coat: Hand card, wool over coat separated from the under coat, a distaff and a slim woolen band.
I have previously written about separating the wools different fibers, placing them in two categories: Under coat and outer coat. The two fibers will be spun separately for this project and I decided to start with the outer coat which I plan to use as warp yarn in my cloth. Wool can be prepared for spinning in many different ways, carding being the most commonly known. Unfortunately carding isn’t a good option for preparing my over coat fibers because I want them to be aligned in order to create a shiny and smooth yarn! Instead I took the outer hairs and flick carded (first technique in this video ) them in order to make them light and airy and then I laid them out in a fan-shape on a tea towel.

Wait, what’s the stick for?
That stick is called a “distaff“, and is essentially a tool that helps you keep a big stash of fibers ready to spin close at hand. Instead of picking up a new fistful of fibers and needing to lug a basked of loose fibre around you make a sort of cotton candy cone wound round a stick and secured with a band. Now you can spin for a much longer time without interruption, which is great of you want to make a lot of yarn or have to walk around while spinning!
Distaffs can be used with drop spindles (As in this picture that I borrowed from Wikipedia) or with a spinning wheel, which I will describe below. Distaffs are often used when spinning long, straight linen fibers but sometimes they are used for wool as well.
I made my distaff from a piece of hazel and it is rather short because my over coat wool hairs are much shorter than the average linen fibers. There are notches on the side of the distaff to keep the wool fibers from sliding off it, and the indentation at the top is where I secure the wool band to the distaff.
Now that we’re all on board with the distaff, this is how I dress it: (make the cotton candy cone that stays on the stick)

The over coat fibers are flick carded and placed in a fan shape, all of them placed in the same direction. I place the distaff on top of the fibers and roll the fibers onto the distaff, starting at one end and turning it until all fibers are rolled around it. While I do this I pull the distaff slightly away from the fibers (So, to the viewers right in this picture). This will help me get a tight fiber cone that holds together nicely.

I aim for a cone-shaped fiber bundle
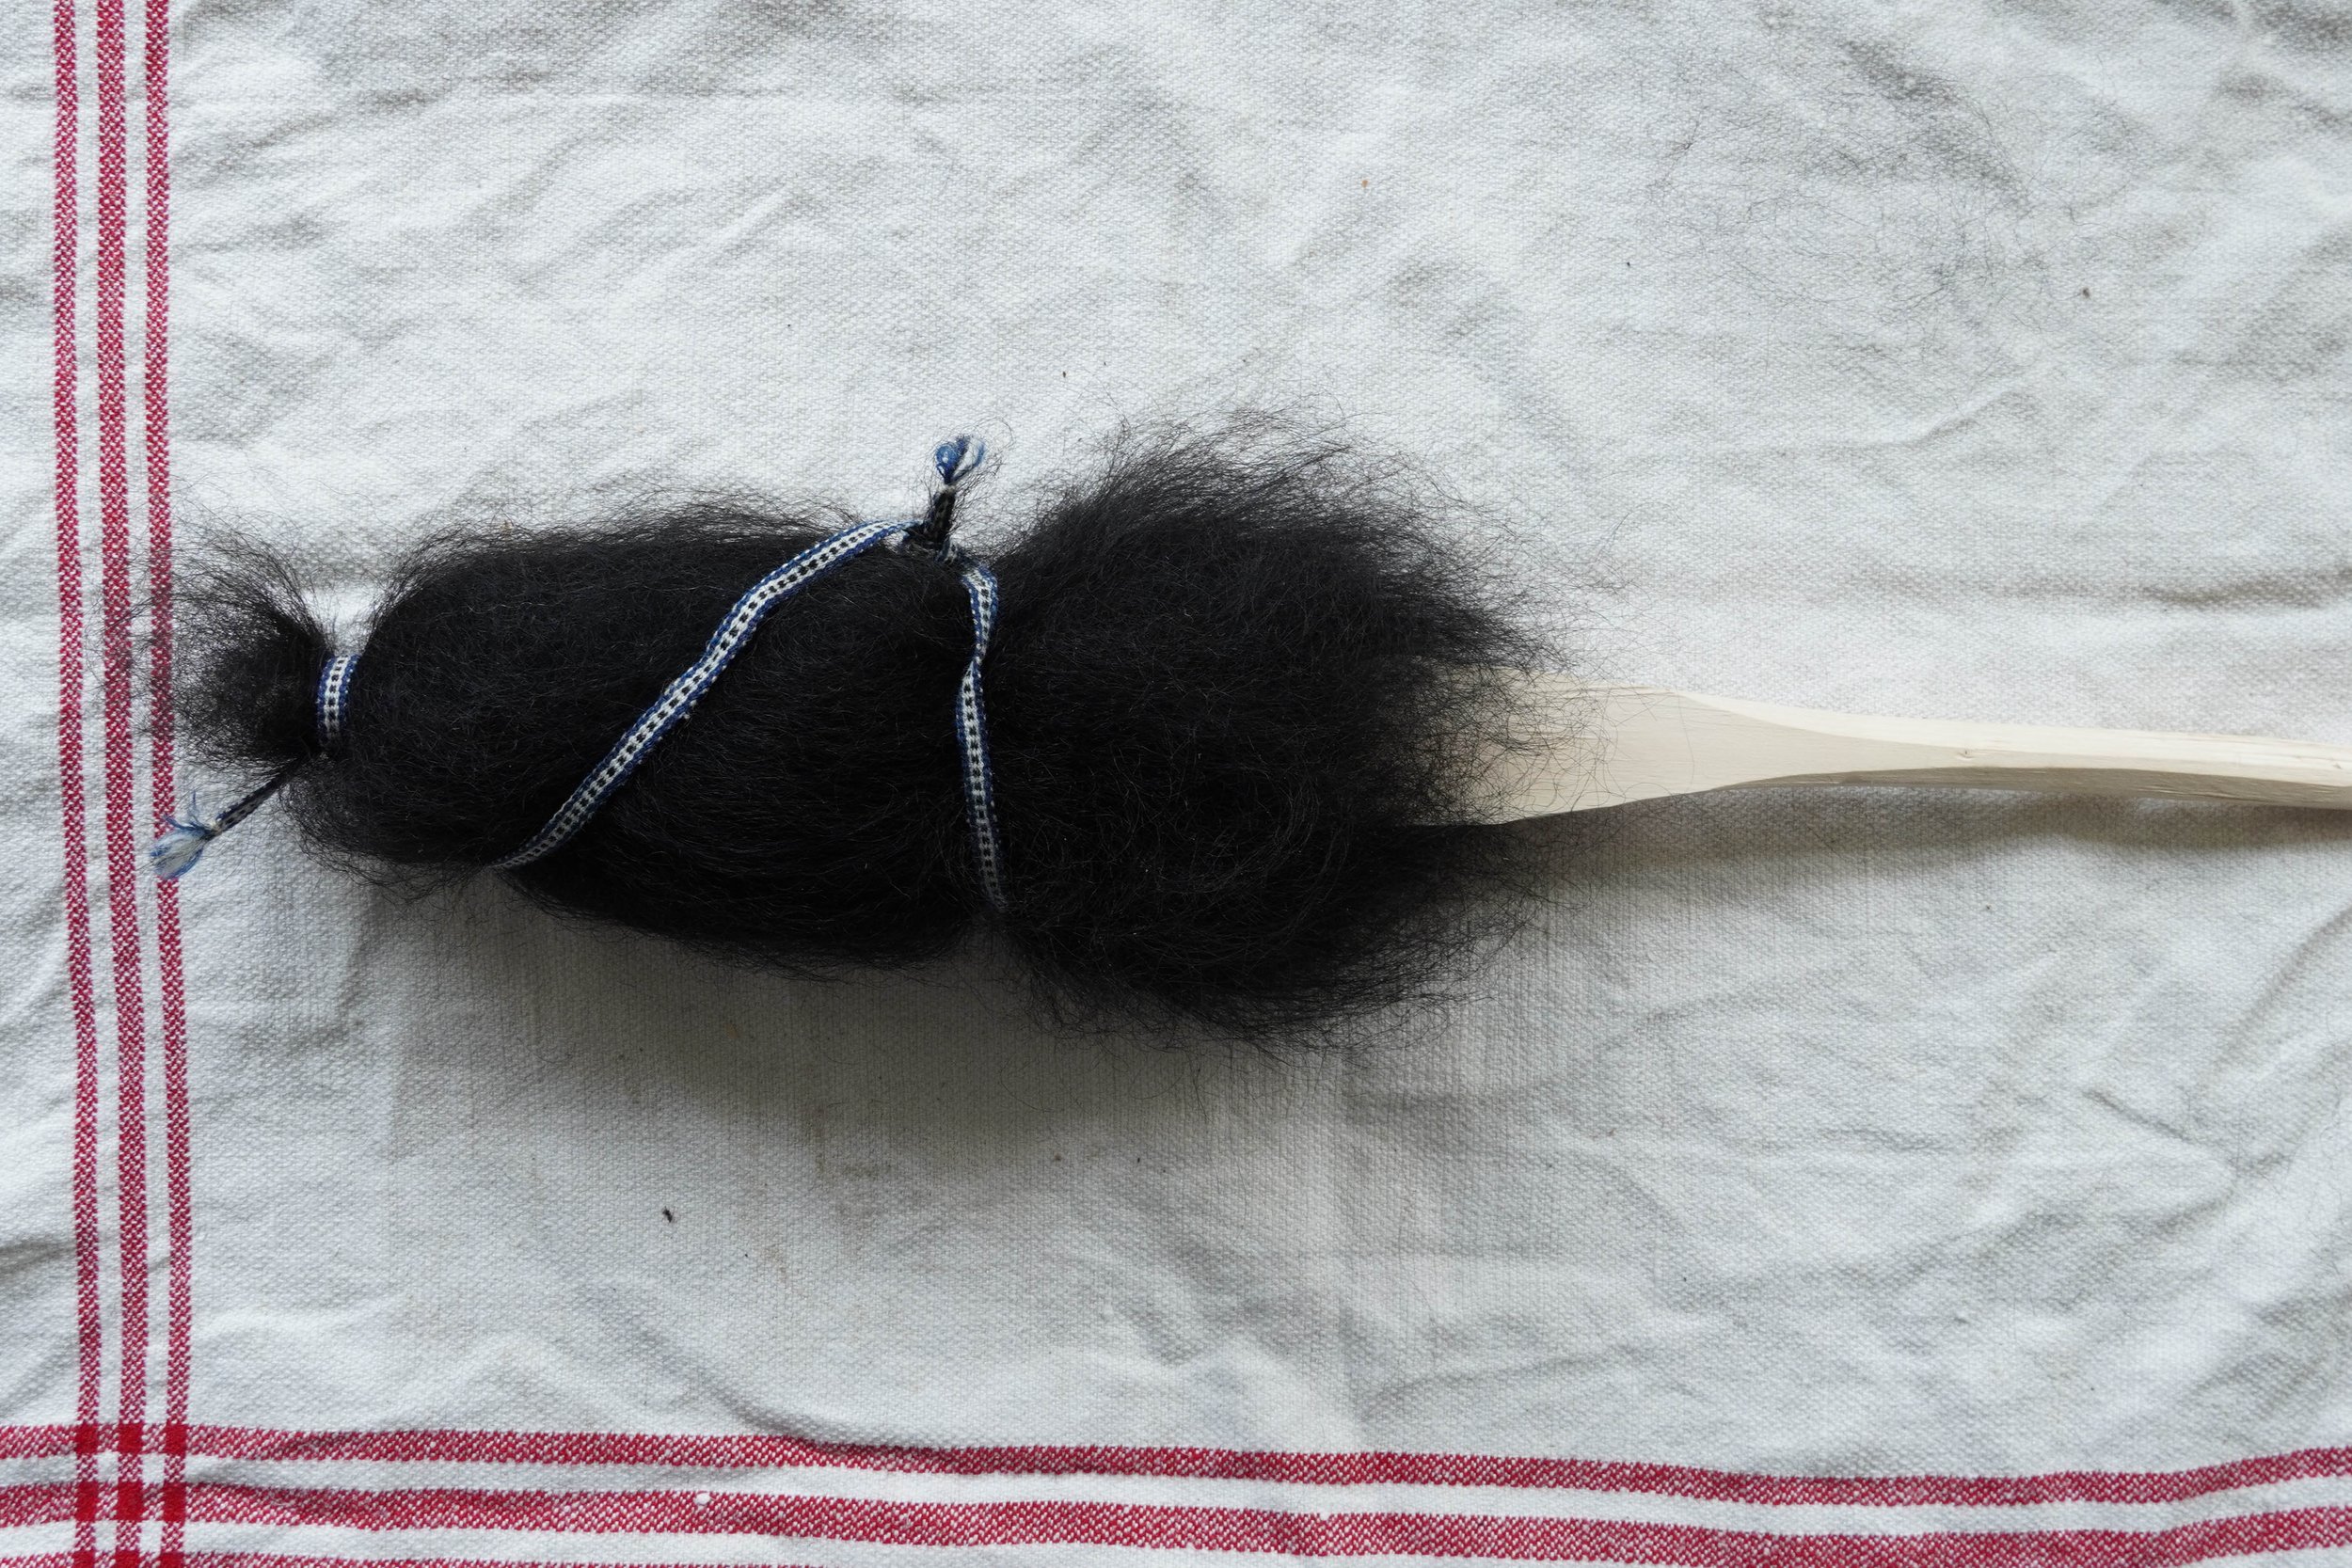
And tie the band in place! It is tightly tied around the top of the distaff, and then loosely wound around the wool cone and tied around it’s waist. I think it would be nice to have a longer band, but this works just fine for me so I stick with it.

And I’m good to go!
And there it is! The distaff is placed in a stand secured to my spinning wheel, and when I spin from it I pull out fibers from the bottom of the fiber bundle and feed them onto the thread.
This is my first time using a distaff to spin wool over coat and I must say it is even more convenient than I expected! I though the fibers would slip off my distaff, or not pull out evenly, or that a million other things would go wrong but this just really seems to work for me.

And the yarn is looking just as smooth and shiny as I was hoping!
This project is funded by Nämnden för hemslöjdsfrågor, a national heritage council funded by the Swedish state.
Do you want to read my previous post about this subject? Here’s a link!